10 Christmas nail inspo simple
Christmas is the perfect time to experiment with nail art that is both festive and easy to achieve. Whether you prefer a subtle look or a bit of sparkle, these simple Christmas nail ideas will elevate your holiday style. Below, we explore ten inspirations with preparation tips, materials, and step-by-step guidance.
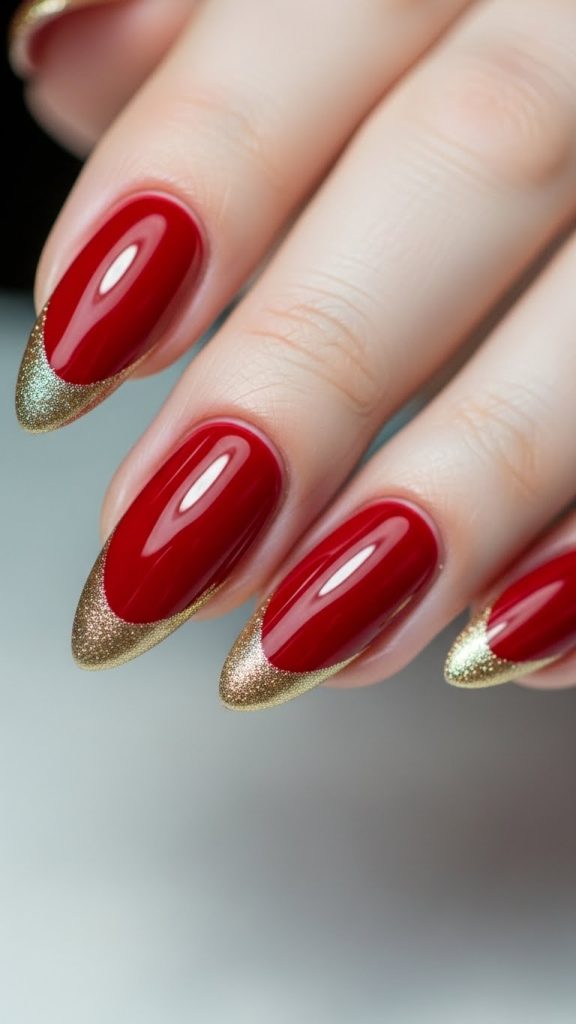
1. Classic Red with Gold Tips
The classic red nail is synonymous with Christmas, and adding gold tips provides a festive twist. To prepare, start by cleaning and shaping your nails with a nail file. Push back the cuticles and buff the nails to create a smooth surface.
Materials needed include a rich red nail polish, gold nail polish or nail striping tape, base coat, and top coat. Apply a base coat to protect your nails and prevent staining. Once dry, apply two coats of red polish for a vibrant finish. Use gold nail polish or a striping tape to create neat tips, carefully following the curve of your nails. Finish with a top coat to seal the design and enhance shine.
This look combines elegance with festive cheer, making it perfect for holiday parties or casual celebrations. The gold tips add a subtle sparkle without overwhelming the classic red, keeping the design chic and timeless.
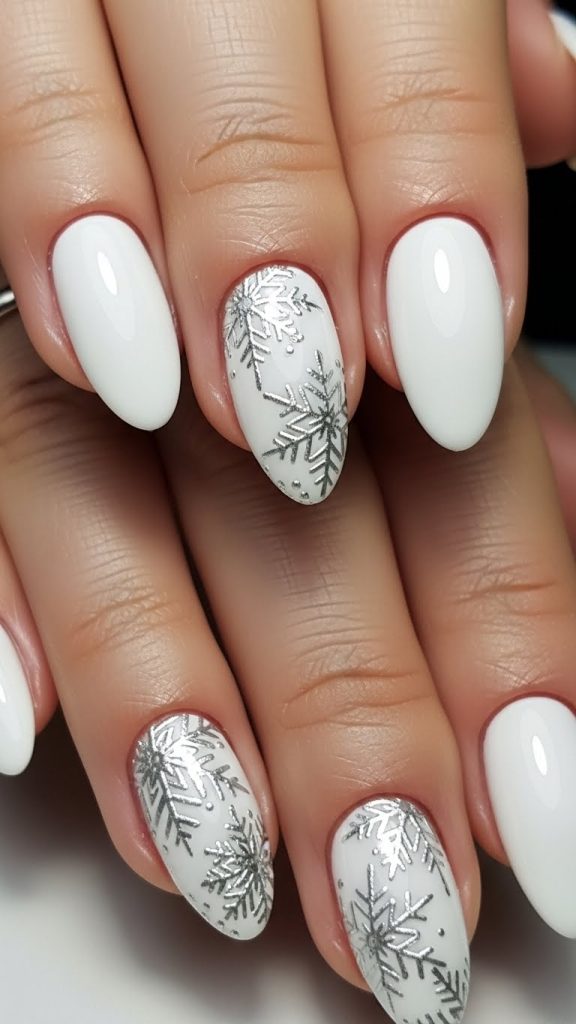
2. Snowflake Accents on White Nails
Snowflakes are iconic symbols of winter and can add a delicate charm to your manicure. Preparation involves trimming, filing, and buffing your nails to smooth out the surface. Moisturize the cuticles to ensure a neat base for nail art.
You will need white nail polish, a thin nail art brush or dotting tool, silver or light blue polish for the snowflake design, base coat, and top coat. Apply a base coat and allow it to dry. Paint all nails with white polish for a snowy canvas. Using the thin brush or dotting tool, draw small snowflakes or dots representing falling snow on one or two accent nails. Finish with a top coat to seal the design and add shine.
This design is subtle yet festive, perfect for those who enjoy understated elegance. The snowflake accent creates a winter wonderland effect without complicated techniques, making it ideal for beginners.
3. Glitter Ombre Nails
Glitter ombre nails add sparkle and dimension to your manicure. Start by preparing your nails: trim, file, and buff to ensure a smooth surface. Apply a base coat to protect the nails.
Materials needed include a neutral or festive base color, fine glitter polish, makeup sponge, and top coat. Paint your nails with the chosen base color and allow them to dry. Use a sponge to dab glitter polish from the tip toward the middle of the nail, creating a gradient effect. Blend carefully to achieve a smooth transition. Seal the look with a top coat to prevent chipping and enhance shine.
This design is perfect for holiday parties, providing a glamorous yet simple option. The gradient effect adds depth and dimension, making your nails stand out while remaining easy to create.

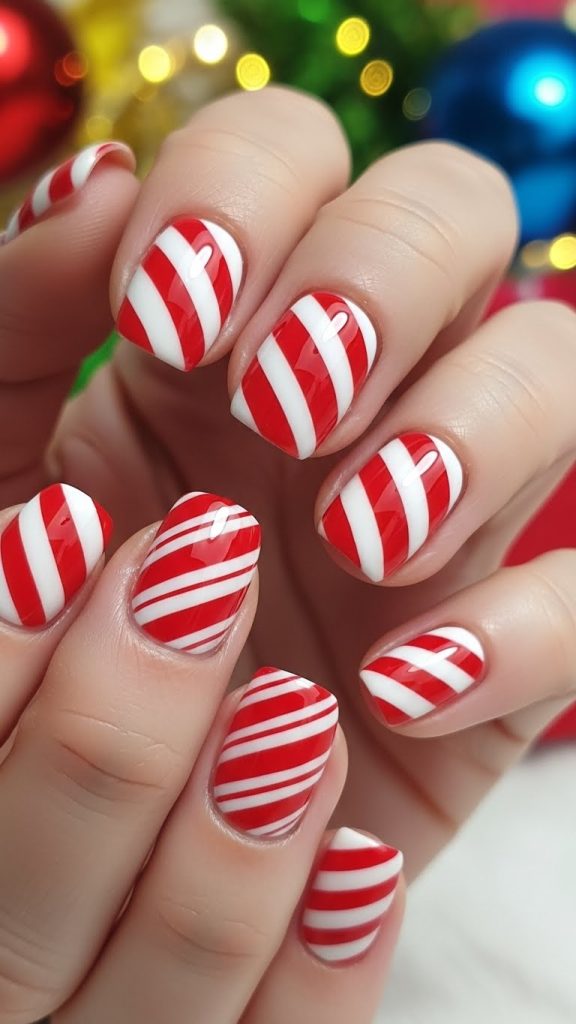
4. Candy Cane Stripes
Candy cane stripes are fun, festive, and easy to create. Start by trimming and filing your nails to the desired shape, then buff the surface for smoothness. Push back cuticles and moisturize for a clean look.
You will need red and white nail polish, a thin brush or striping tape, base coat, and top coat. Apply a base coat and let it dry. Paint the nails white, then use a thin brush or striping tape to add red diagonal stripes, mimicking the candy cane pattern. Finish with a top coat to protect the design and add shine.
This design is playful and perfect for anyone looking to add a cheerful holiday touch. The candy cane stripes are easy to execute, making them an excellent choice for both beginners and experienced nail enthusiasts.
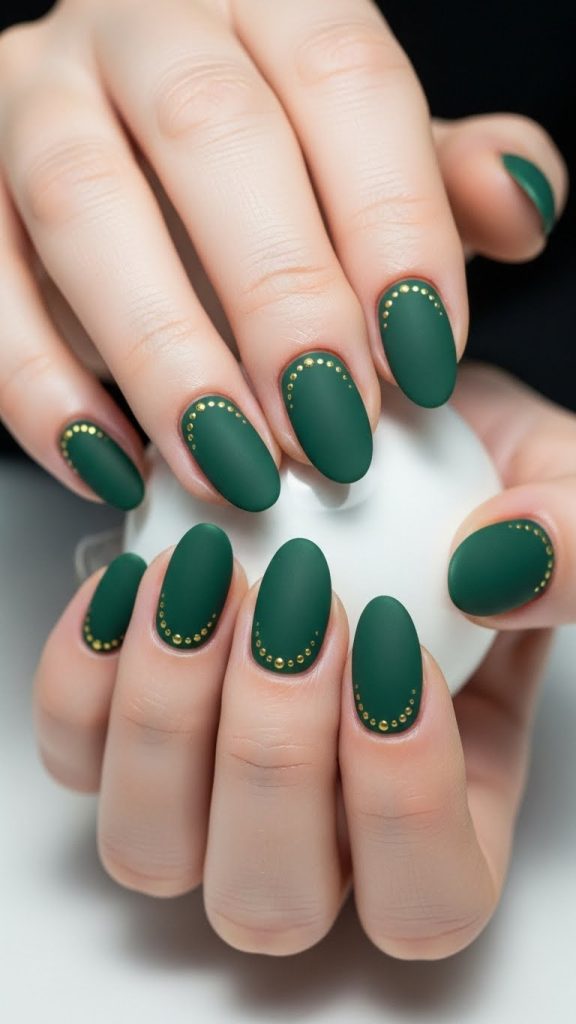
5. Matte Green with Gold Dots
Matte green nails paired with gold dots create a sophisticated Christmas look. Start by preparing nails: trim, file, buff, and moisturize cuticles.
Materials needed include matte green nail polish, gold polish or nail studs, dotting tool, base coat, and matte top coat. Apply a base coat to protect the nails. Paint your nails with matte green polish, applying two coats for full coverage. Use a dotting tool to add gold dots randomly or in a structured pattern. Finish with a matte top coat to seal the design while keeping the matte effect intact.
This minimalist design is ideal for those who prefer understated elegance. The matte finish adds depth, while the gold dots provide just enough sparkle to evoke a festive feeling.
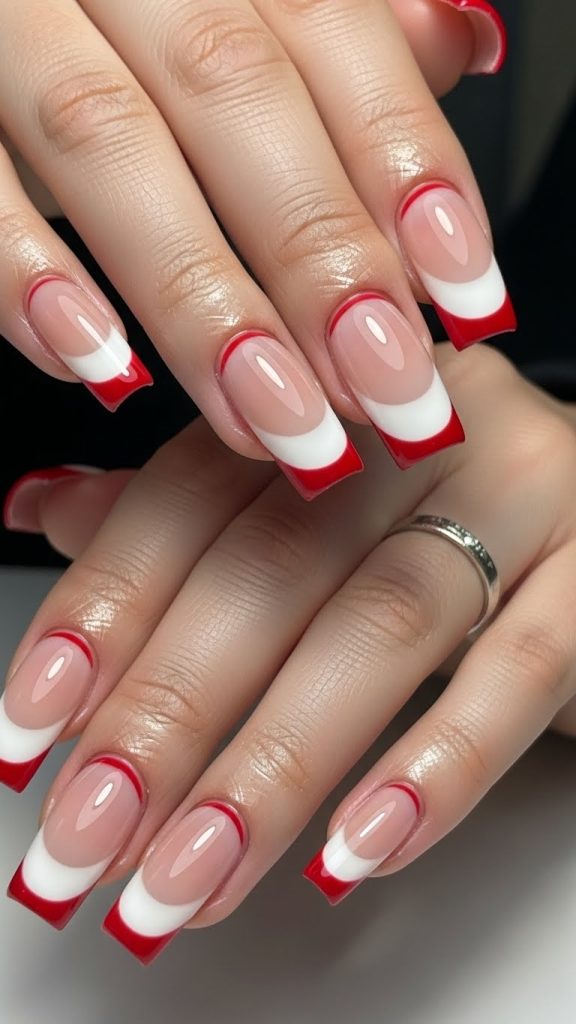
6. Red and White French Tips
French tips get a festive twist with red and white. Start with clean, shaped nails, and smooth nail surfaces with a buffer.
Materials needed include red nail polish, white polish, base coat, and top coat. Apply a base coat and let it dry. Use white polish to create traditional French tips on each nail. On top of this, add thin red tips just above the white to create a double-layered look. Seal with a top coat for durability and shine.
This design combines elegance with holiday colors, offering a subtle yet festive option. It is ideal for formal events or everyday holiday wear, providing a classic look with a modern twist.
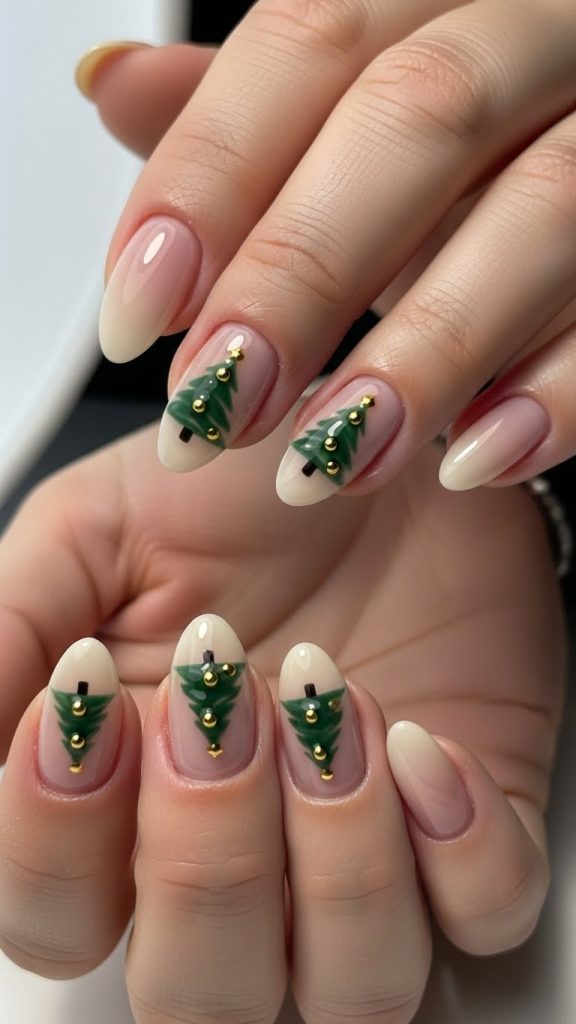
7. Minimalist Christmas Tree Nails
Minimalist Christmas tree designs are subtle yet festive. Prepare nails by trimming, filing, and buffing. Push back cuticles and moisturize.
Materials include green polish, tiny rhinestones or gold dots, thin brush, base coat, and top coat. Paint the nails a neutral or pale color to allow the trees to stand out. Using the thin brush, draw small triangular shapes representing trees. Decorate with tiny dots or rhinestones as ornaments. Finish with a top coat to secure the design.
This design is simple and elegant, perfect for someone who prefers minimalist holiday decorations. The small Christmas tree adds a festive element without overwhelming the nails, making it suitable for both casual and professional settings.
8. Silver Sparkle Nails
Silver sparkle nails are glamorous yet simple. Start by shaping and buffing your nails. Moisturize cuticles and apply a base coat.
You will need silver glitter polish, neutral or light base color, and top coat. Paint nails with the base color and let them dry. Apply silver glitter polish on one or more accent nails, or layer it on all nails for full sparkle. Seal with a top coat to protect the glitter and extend wear.
This look is perfect for holiday parties and evening events. The glitter provides a festive shine that complements any outfit while being easy to create.

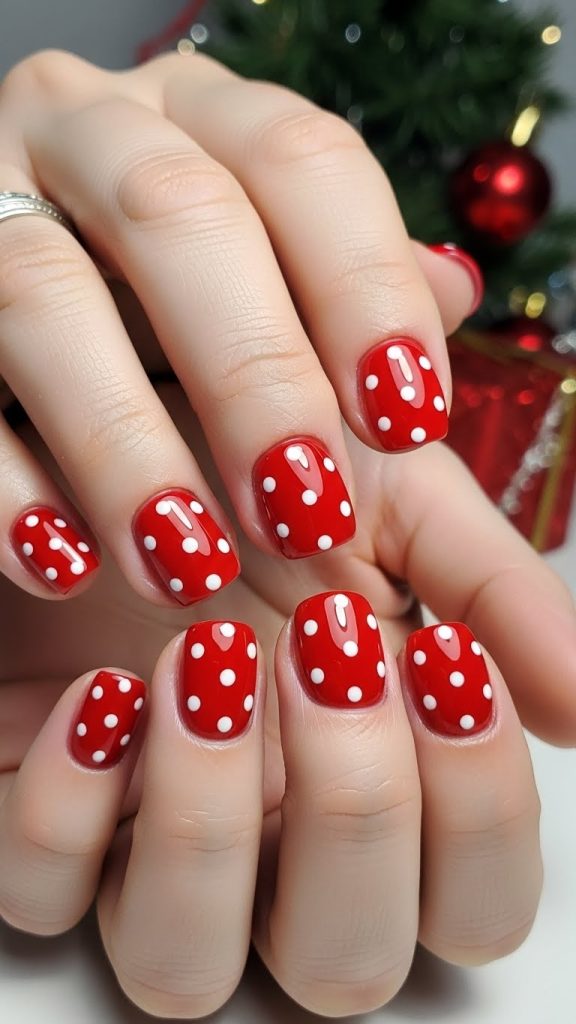
9. Red Polka Dot Nails
Red polka dot nails combine classic red with playful dots. Prepare nails by trimming, filing, and buffing. Apply a base coat to protect nails.
Materials needed include red nail polish, white polish, dotting tool, and top coat. Paint all nails red and let them dry. Using a dotting tool, add small white dots evenly across the nails. Finish with a top coat to seal the design and add shine.
This design is cheerful and festive, offering a playful twist on classic red nails. The polka dots are simple to apply, making it a quick option for last-minute holiday nail designs.
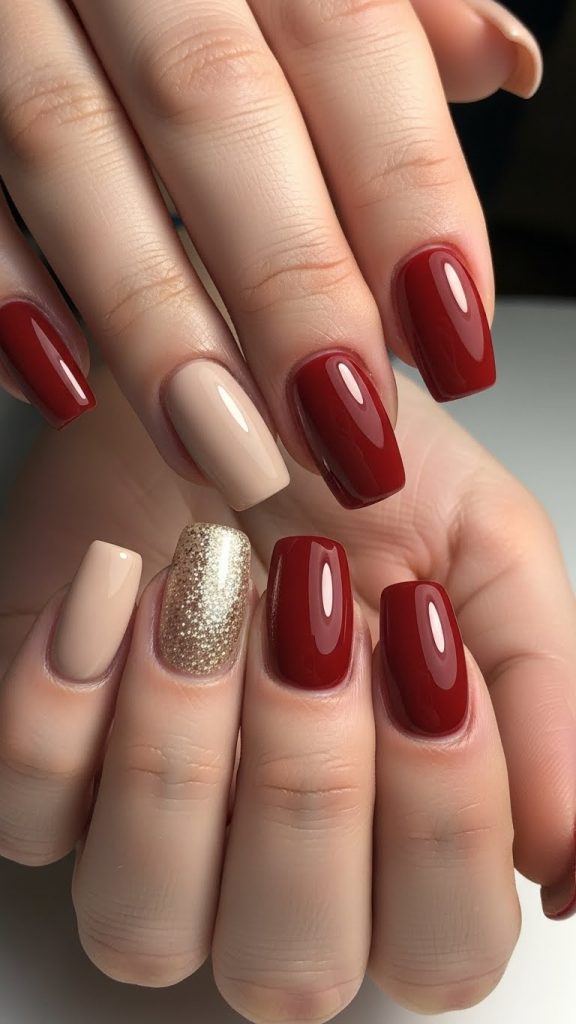
10. Gold Accent Nail
A gold accent nail adds a touch of elegance to a simple manicure. Start by preparing nails through trimming, filing, and buffing. Apply a base coat for protection.
Materials include your choice of neutral or red polish, gold glitter or foil for the accent nail, and top coat. Paint all nails with the base color and let them dry. Apply gold polish or foil to one or two accent nails. Finish with a top coat to secure the accent and enhance shine.
This design is minimal yet festive, allowing the gold accent to stand out. It works well for those who prefer simplicity but still want to capture the holiday spirit.
About Me

Chesung Subba
Author/Writer
Hello, I'm Chesung Subba, a passionate writer who loves sharing ideas, stories, and experiences to inspire, inform, and connect with readers through meaningful content.
Follow Me
Connect with me and be part of my social media community.
Leave a Reply